How to install wordpress
Attention
This tutorial assumes you have already set up your server and already create a server user. If you haven't done that yet, please follow our tutorial Just ordered a server now what.
Attention
This tutorial assumes your domain is registered with ZEST or ZEST manages your DNS. If you are using a different DNS provider, you will need to get in touch with ZEST support to get the necessary DNS records added.
1- Open up your server in ZEST dashboard.
Click here to open your dashboard and select the server you want to run wordpress on.
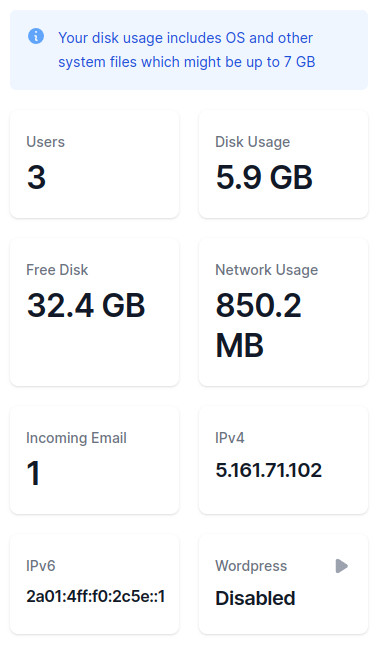
2- Click on the play icon in the Wordpress widget.

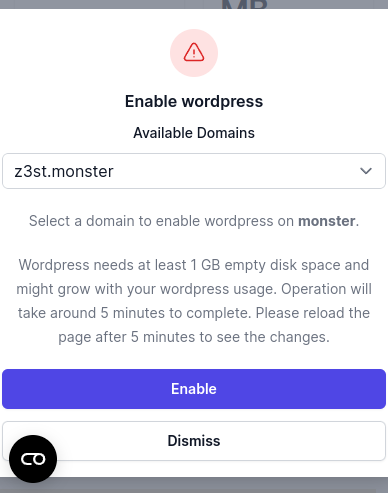
3- Select the domain you want to install WordPress on. Enable click on the "Enable" button.

4- Wait for the installation to complete. You'll receive an email when the installation is complete.
5- You can now access your WordPress site by visiting the domain you selected.
You can start customizing your site by logging into the WordPress admin dashboard. To do this, visit your domain followed by /wp-admin. For example, if your domain is example.com, you would visit example.com/wp-admin.

Get started today
It’s time to take control of your data.
14 day money back guarantee! Pick your server now