How to setup a personal VPN server with WireGuard on AWS
What is Wireguard
WireGuard, a nimble Virtual Private Network (VPN), accommodates both IPv4 and IPv6 connections, empowering users to navigate untrusted networks with confidence, akin to being on a private network. This ensures a shielded pathway to the internet from devices like smartphones or laptops, particularly when tethered to unsecured networks such as those in hotels or coffee shops.
WireGuard's encryption framework relies on the interplay of public and private keys to forge encrypted passages between peers. Each iteration of WireGuard is tailored with a distinct cryptographic cipher suite, accentuating simplicity, security, and harmonious coexistence with peers.
In contrast, VPN solutions like OpenVPN and IPSec lean on Transport Layer Security (TLS) and certificates for authentication and the establishment of encrypted tunnels between systems. While TLS flaunts versatility by accommodating an array of cryptographic suites and algorithms, it complicates VPN configuration with protracted setup procedures and potential pitfalls.
This tutorial steers you through the process of setting up WireGuard on an Ubuntu 22.04 server and configuring another machine as a peer, unlocking the potential for both IPv4 and IPv6 connections (commonly known as a dual-stack connection). Furthermore, it unveils the art of routing the peer's internet traffic through the WireGuard server in a gateway configuration, all the while erecting an encrypted peer-to-peer tunnel using the VPN.
For the sake of this tutorial's clarity, we'll also configure a client for testing purposes.
This tutorial assumes you have an AWS account and are familiar with the AWS Management Console. If you are new to AWS, please refer to the Getting Started section
Launching an AWS EC2 instance
To begin, log in to the AWS Management Console and navigate to the EC2 Dashboard. Click on the Launch Instance button to initiate the instance creation process.
Name and tags
Write a name for your instance in the Instance name field.
Application and OS Images (Amazon Machine Image)
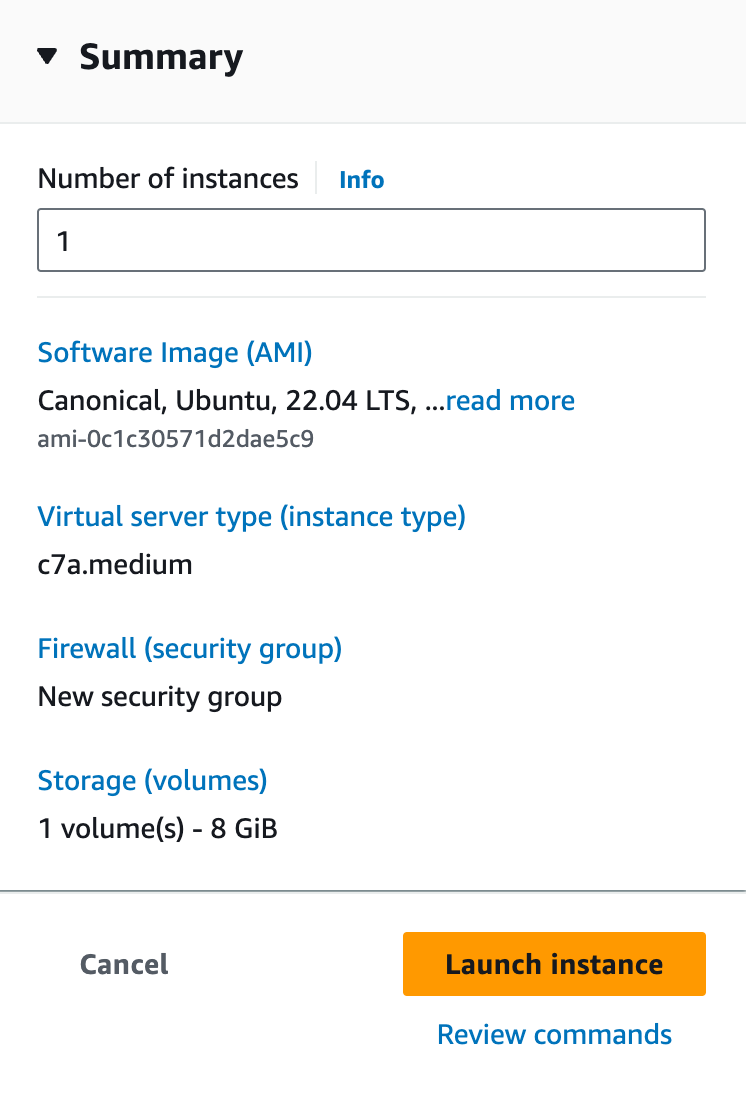
Select the Ubuntu Server 22.04 LTS (HVM), SSD Volume Type Amazon Machine Image (AMI) from the Quick Start tab. Click on the Select button to proceed.
Instance Type
Choose the t2.micro for a free trial or you can select c7a.medium which matches ZEST Small Plan' computing power.
Key pair (login)
Create a new key pair or use an existing one. If you are creating a new key pair, download the private key file and store it in a secure location. You will need this key pair to connect to your instance.
Network settings
Make sure to select the default VPC and subnet. You should also enable public IP for your instance. Allow all SSH traffic from anywhere for simplicity. You can restrict the traffic later.

As a result, your summary should look like this. Go ahead and click on the Launch insance button.

Navigate to the Instances section in the EC2 Dashboard and select the instance you just created. Note the public IP address of the instance.
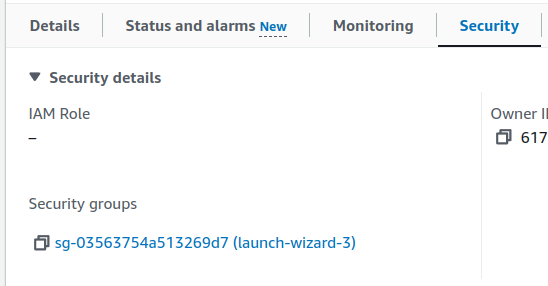
Now we need to add port 51820 to the security group. Click on instance id and then click on the security tab. You'll see a link with security group id in the description. Click on it to enter security group configuration.

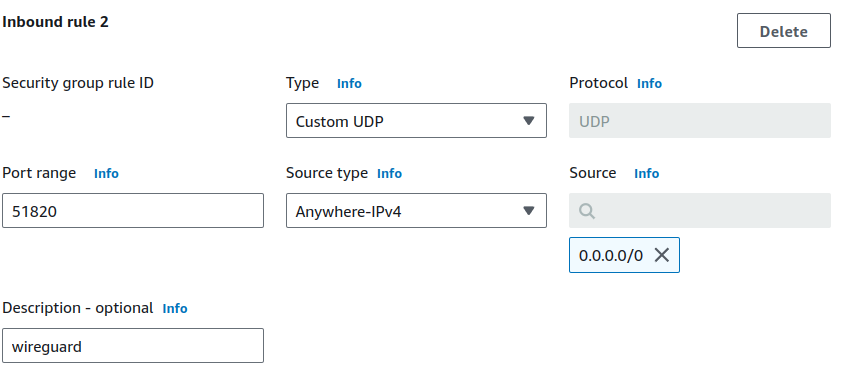
Click on Edit inbound rules and add a new rule with WireGuard as the type, UDP as the protocol, and 51820 as the port range. You can restrict the source to your IP address for security.

Click on Save rules to apply the changes.
Configuring the WireGuard server
ssh -i /path/to/your/private-key.pem ubuntu@your-ec2-public-ipsudo apt update
sudo apt upgrade -y
sudo apt install wireguardwg genkey | tee privatekey | wg pubkey > publickeyumask 077 is a command that sets the file mode creation mask (umask) for the current shell session. It ensures that the private key file is only readable by the owner.
ip route | grep default | awk '{print $5}'sudo nano /etc/wireguard/wg0.conf[Interface]
Address = 10.0.0.0/8
PrivateKey = SERVER_PRIVATE_KEY
ListenPort = 51820
SaveConfig = true
PostUp = iptables -A FORWARD -i wg0 -j ACCEPT
PostUp = iptables -t nat -A POSTROUTING -o eth0 -j MASQUERADE
PostUp = iptables -A FORWARD -i eth0 -o wg0 -m state --state RELATED,ESTABLISHED
PostDown = iptables -D FORWARD -i wg0 -j ACCEPT
PostDown = iptables -t nat -D POSTROUTING -o eth0 -j MASQUERADE
PostDown = iptables -D FORWARD -i eth0 -o wg0 -m state --state RELATED,ESTABLISHED -j ACCEPT
Configuring Network
sudo nano /etc/sysctl.confnet.ipv4.ip_forward=1sudo sysctl -psudo systemctl enable [email protected]Configuring GUI client
Download and install the WireGuard client from the official website. You can find the download link here. We're going to cover the Apple client in this tutorial. Available in AppStore as WireGuard. https://apps.apple.com/us/app/wireguard/id1451685025
Once installed, open the WireGuard app and click on the + button to add a new tunnel. You'll be presented with a screen to add a new tunnel. Click on Create from scratch. You'll notice that a client private and public key are already generated for you. You can use these keys to configure the peer.
Fill in the server's public IP address and the port you configured in the server. You can also add a name for the server. Once you're done, click on the Save button.
Copy auto generated public key, you'll need it to configure the server.
[Interface]
PrivateKey = keep_autogenerated_private_key
Address = 10.8.0.2/24
DNS = 1.1.1.1

[Peer]
PublicKey = server_public_key
AllowedIPs = 0.0.0.0/0
Endpoint = your_server_ip:51820
PersistentKeepalive = 25
Now, click on the server you just added and click on the Activate button. You should see a green dot next to the server name indicating that the connection is active.
Add peer to the server
Now, you need to add the peer to the server. You can do this by adding the peer's public key to the server's configuration file.
sudo wg set wg0 peer your_client_public_key allowed-ips 10.8.0.2/24Now go ahead connect to the server from the client and you should be able to access the internet through the VPN.

Don't have time to set up your own VPN server? Try ZEST!
It’s time to take control of your data.
14 day money back guarantee! Pick your server now